Warranty
Thank you very much for selecting Green World Industries hardwood flooring. We sincerely hope your new floors will bring you the warmth, comfort and beauty that only genuine wood can provide. It is important to read ALL of the following installation and care and maintenance instructions and our warranty information PRIOR to installation. Please read our Installation Instructions, Care and Maintenance Guidelines and Warranty information carefully. Adherence to Green World’s Industries installation and our care and maintenance instructions and our warranty information is necessary to ensure that you will get the full benefit of your flooring for years to come.

INSTALLATION INSTRUCTIONS
Our engineered hardwood floors are acceptable for glue down, nail down, or staple installation. A floating installation is accepted if the product is at least 5” wide and ½” thick. We recommend that the installer follow all installation guidelines as set forth by the National Wood Flooring Association (NWFA) for all phases of the installation.
PRIOR TO INSTALLATION—INSTALLER AND HOMEOWNER RESPONSIBILITIES
Color Variation
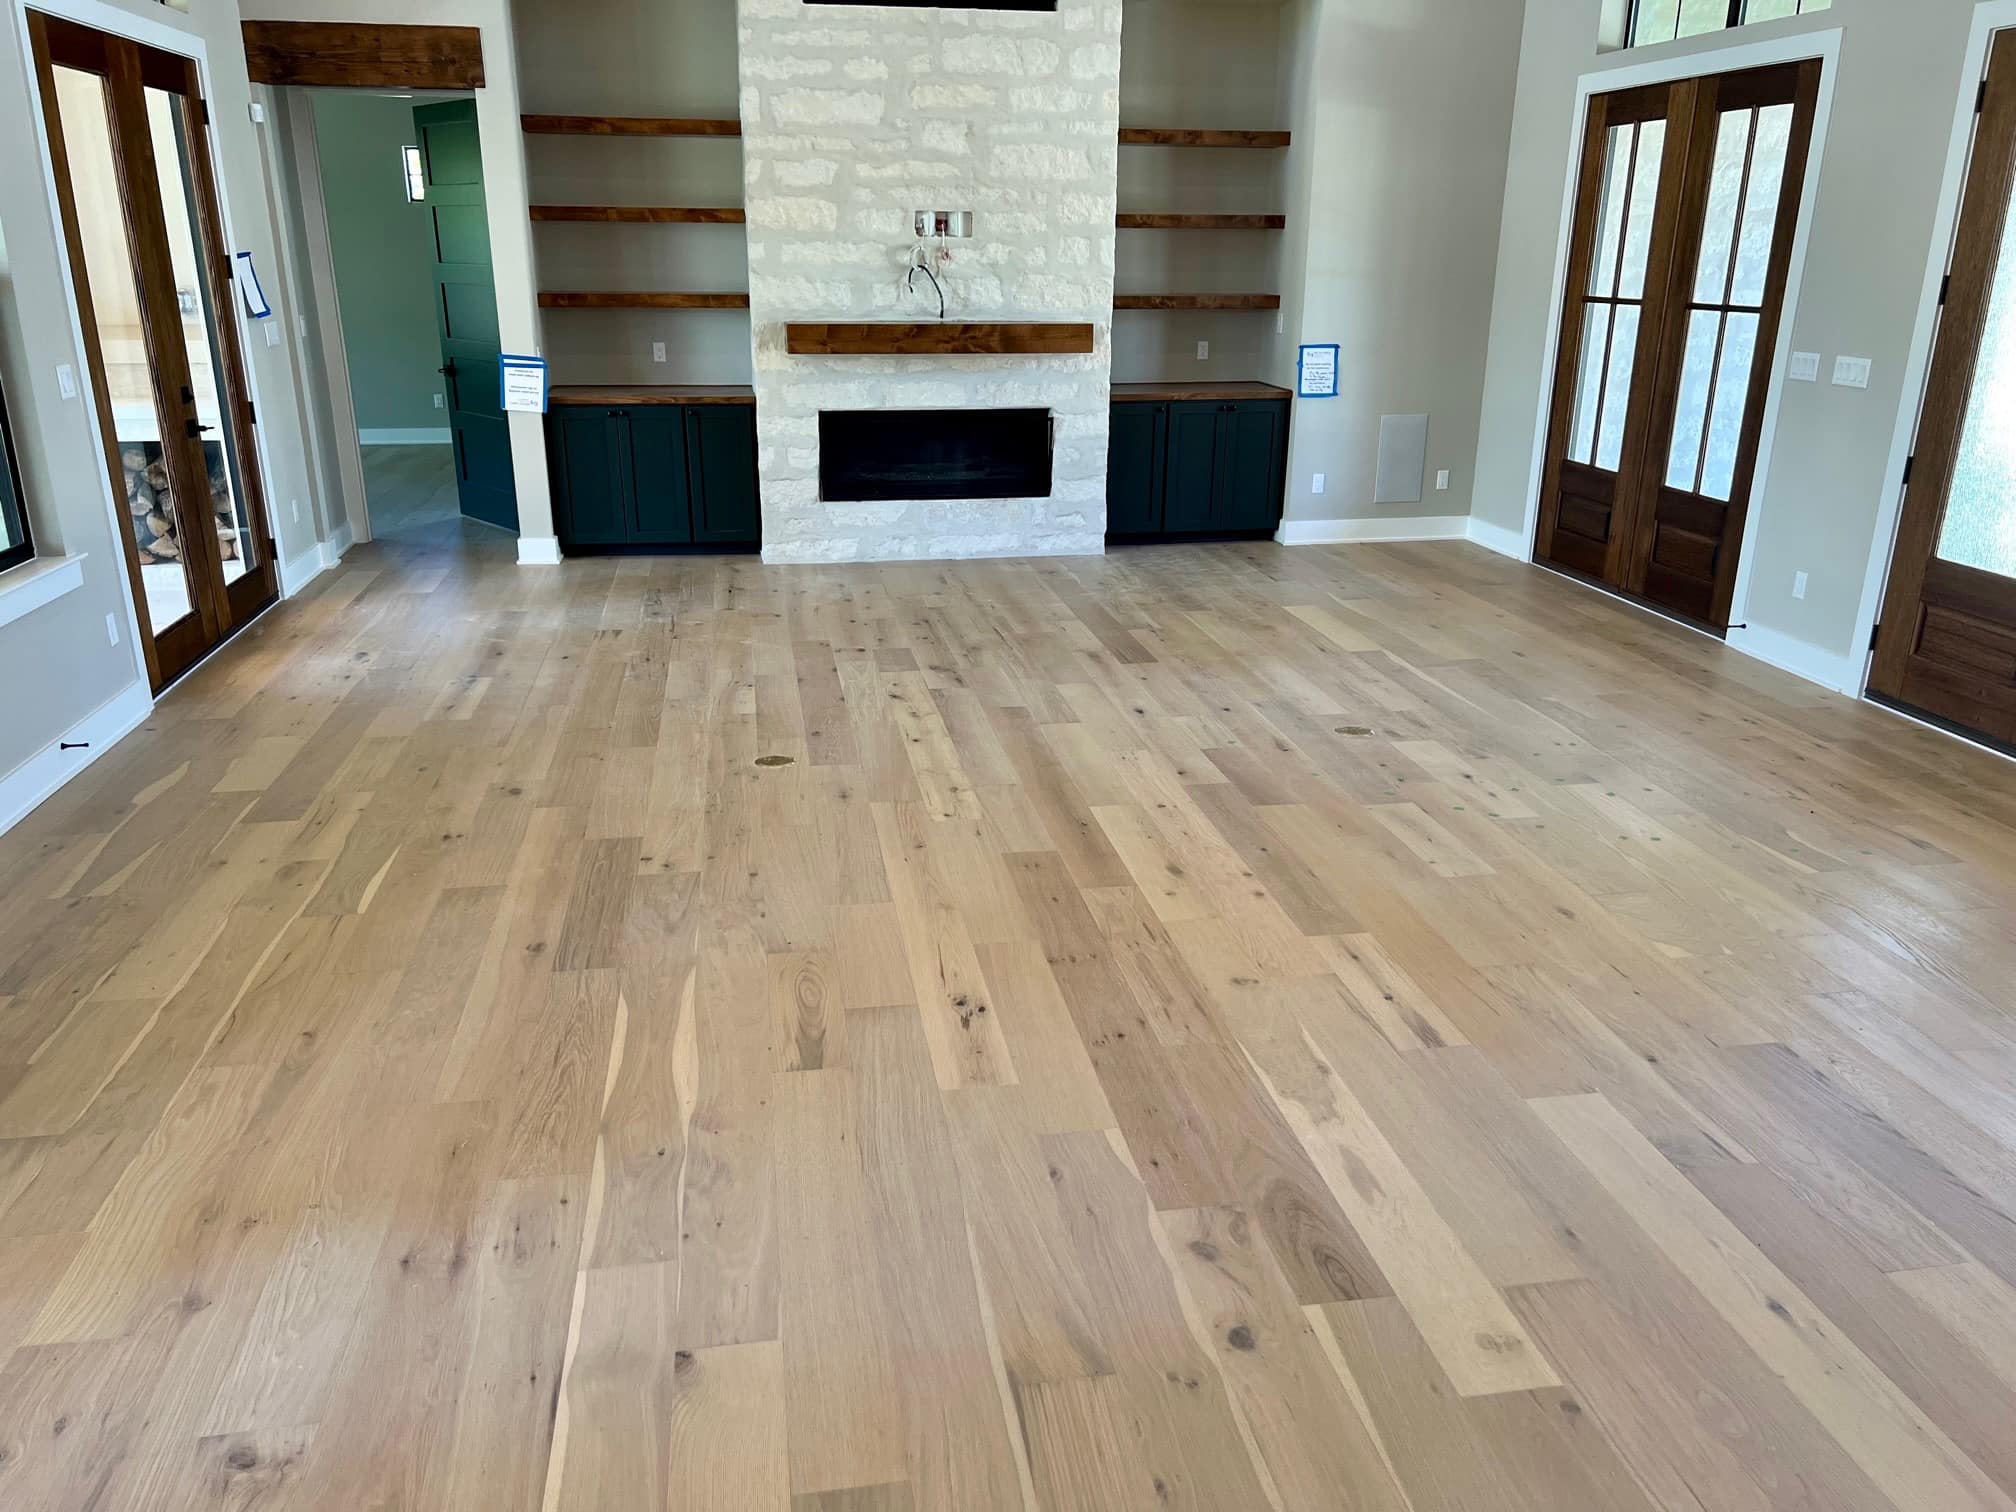
Wood is a natural product and will vary in color, tone and grain from tree to tree and from plank to plank. For the best visual effect, shuffle planks from several cartons. Our floors are manufactured in accordance with accepted industry standards, which permit a natural or manufacturing defect tolerance, not to exceed 5%. Green World Industries cannot guarantee against color variations within a floor, or variations between samples and the installed floor.
The installer MUST perform a detailed product quality inspection. Material must be inspected for quality, quantity, species and color prior to installation. Ensure adequate lighting for proper inspection. IF THE MATERIAL IS NOT ACCEPTABLE, DO NOT INSTALL IT, AND CONTACT THE SELLER IMMEDIATELY. Green World Industries will exchange the material in a timely fashion. Installation of the flooring indicates acceptance. If a visibly defective board or floor is installed, Green World Industries will not be responsible for or pay the cost of labor for repair or replacement of the defect floor.
Acclimation and Suitability*
As relative humidity varies in different parts of the country, acclimation of the flooring prior to installation is the most important precaution to take in order to ensure a successful installation. Proper acclimation is necessary to adapt the moisture content of the flooring to the conditions of your environment.
Room temperature and humidity of installation area must be consistent with normal, year-round living conditions for at least one week before installation of flooring. A consistent room temperature of 60 to 70 degrees Fahrenheit and humidity range of 40-60% is recommended.
Our floors must be acclimated for a minimum of 72 hours prior to installation. Our product needs to be placed on the job site, under controlled temperature, humidity, moisture and mechanical ventilation conditions. (Please refer to and follow all NWFA guidelines.) The wood should be placed in the environment, unopened, but not directly on the floor to be installed. If placed in the area to be installed, the installer must raise product at least 4 inches off of floor to allow air flow.
*Responsibility for the suitability of Green World Industries flooring and accompanying products for each individual installation cannot be assumed by Green World Industries, since Green World Industries has no control over the installer’s proper application.
In addition to acclimation requirements, homeowners need to understand conditions in their part of the country, such as:

Seasons: Heating and Non-Heating
Heating season (Dry)—A humidifier is recommended to prevent excess shrinkage in wood floors due to low humidity levels. Wood stoves and electric heat, in particular, tend to create very dry conditions.
Non-Heating Season (Humid, Wet)—Proper humidity levels must be maintained by use of an air conditioner, dehumidifier, or by turning on your heating system periodically during the summer months. Avoid excessive exposure to water from tracking during periods of inclement weather. Do not obstruct in any way the expansion joint around the perimeter of your floor.
Subfloor Inspection and Preparation
Hardwood flooring should be one of the last items installed for any new construction or remodel project. All work involving water or moisture should be completed before hardwood flooring installations. Wood flooring may not be acceptable for full bathroom installations because of moisture associated with these areas.
It is the responsibility of the installer to determine that the job-site environment and subfloors meet or exceed all applicable standards and recommendations of the construction and materials industries
GREEN WORLD INDUSTRIES IS NOT RESPONSIBLE FOR ANY ON-SITE CONDITIONS
The quality of your floor installation is dependent on quality and preparation of the subfloor. Acceptable subfloor types with tips to prepare are below:
- CDX Underlayment Grade Plywood (at least ½” thick)
- OSB (at least ¾” thick)
- Existing hardwood floor. For these three wood types, they must be smooth and dry. Squeaks and popping areas should be screwed down prior to spreading adhesive. Nail or screw every 6” along joists to avoid squeaking. If not level, sand down high spots and fill low spots with an acceptable underlayment patch.
- Resilient tile and sheet vinyl (glue down only), Vinyl must be securely fastened to the subfloor with full spread adhesive. Loose laid or perimeter glued sheet vinyl must be removed. Degloss flooring as necessary to create a good adhesive bond using an abrasive pad. Do not sand sub-surfaces such as vinyl or synthetic tiles that may contain asbestos.
- Underlayment grade particle board (glue down only)
- Concrete slabs (floating and glue down). On, above, are below grade installations are acceptable. Must be clean, dry and smooth within 3/16” over 10’. Concrete slabs must be fully cured, at least 60 days old, and should have a minimum 6-mil polyethylene film between concrete and ground.
- Ceramic tile (floating and glue down). Ceramic tiles should be securely fastened to the subfloor. If grout lines are too deep, they need to be filled. If this is a glue down installation, rough up surface with a sander or grinder and clean to remove all dust.
- Terrazzo (floating and glue down). If this is a glue down installation, the surface should be lightly sanded and cleaned with mineral spirits prior to spreading the adhesive. Allow the mineral spirits to dry prior to spreading the adhesive.
Subfloor must be:
- Structurally sound. Screw down loose areas to reduce squeaking, and replace water damaged or delaminated sub-flooring or underlayment.
- Clean. It should be thoroughly swept and free of all debris, free of wax, grease, paint, sealers, old adhesives and other substances.
- Flat to specifications of 3/16” within a 10’ radius. If subfloor prep work is required, “hills” should be sanded down and “valleys” filled with an underlayment patch.
- Dry and remain dry year-round. Concrete must be tested for moisture content using the Anhydrous Calcium Chloride test method, a non-invasive moisture meter, or a pin/probe moisture meter. If you feel your concrete is beyond acceptable industry standards, please contact a professional hardwood flooring installer to improve your subfloor to an acceptable level.
- Door casings should be undercut or notched out so flooring will fit underneath.
INSTALLATION
These are most of the tools needed for installation:
- Electric Power Saw, Circular or Jigsaw
- Wooden or plastic spacer wedges
- Chalk line
- Broom
- Hammer
- Adhesive or adhesive remover
- Handsaw
- Trowel
- Tape measure
- Moisture Testing Equipment
- Pull bar
- 3M Blue Masking Tape or Equivalent (DO NOT ADHERE TO OIL FINISHED FLOORS)
- Tapping block
For nail down or staple down installations, you will also need an air stapler/nailer compatible with the profile of the flooring material. 1 ½” to 2: nail, cleat or staple that is compatible with the profile of the flooring material. For glue down installations, you need an approved floor adhesive and trowel. For floating installations use white wood glue. See your flooring retailer for approved adhesives.
Caution: By not using the proper tools, “puckering” may result on the face of the plank. Green World Industries is not responsible for problems caused by the use of improper tools. See your distributor for tool recommendations and use. Note: Never strike the plank edges directly with a hammer—always use a wooden block to protect the edges of the boards.

LAYOUT
Layout should be designed to save labor and materials, as well as to enhance the appearance of the floor. Lay the floor so that the end joints are staggered at least 8 inches. Staggered or irregular joints mean less material waste and a better overall appearance. Plan the layout so that the last row of flooring (which usually needs to be cut lengthwise) is not too narrow. In some cases, it may be necessary to cut the first row as well as the last row. Allow 3/8” expansion space along all walls. Flooring should be laid at right angle to the floor joint and, if possible, in the directions of the longest dimension of the room. Use wood or plastic spaces during installation to maintain this 3/8” expansion space. Work from several boxes and “dry lay” the floor before permanently laying the floor for a more harmonious pattern. Remember, it is the installers’ responsibility to determine the expectations of what the finished floor will look like with the end user first and then to cull out pieces that do not meet those expectations.
Begin installation next to an outside wall. This is usually the straightest and best reference for establishing a straight working line. Establish this line by measuring an equal distance from the wall at both ends and snapping a chalk line. The distance you measure from the wall should be the width of a plank plus about 3/8” for expansion space. You may make a straight working line if the wall is out of straight.
You may want to dry lay a few rows, (no glue or nails). Before starting to confirm your layout decision and working line. When laying flooring, stagger end joints from row to row by at least 8”. When you begin cutting thee last plank in a row to fit, you can use the cut-off end to begin the next row. If cutoff end is 8” in length or less, discard and instead cut a new plank at a random length and use it to start the next row. Always begin each row from the same side of the room.
To draw planks together, always use a tapping block (a short piece of flooring), as tapping the flooring itself will result in edge damage. For best results, flip the tapping block upside down and use groove edge to top the tongue edge of the plank being installed. Fit end joints tightly together before tapping long edges together. When near a wall, you can use a pry bar to pry close the side and end joints. Take care not to damage edge of flooring. For glue down and floating applications, use 3M® Blue Tape to hold any pieces which might have side bow and need to be held straight and tight until the adhesive set up. DO NOT ADHERE TAPE OF ANY KIND TO OIL FNISHED FLOORS.
GLUE DOWN INSTALLATION
Make sure subfloor is tested for moisture content first and is properly prepared.
On concrete subfloors, which are on or above grade (ground level), always assume the worst even if they measure dry. We recommend taking the following installation steps to ensure a trouble-free installation.
- Testing and documenting moisture content prior to installation
- Applying an industry approved sealer to the concrete
Use flooring adhesive recommended by your retailer. Use of another manufacturer’s adhesive may result in failure and void warranty. Follow adhesive manufacturer’s instructions for proper trowel size, minimum temperature, adhesive set time and open times before beginning installation of flooring.
Once the spread of adhesive has setup sufficiently per adhesive manufacturer’s instructions, lay the first row of flooring with groove facing the wall, and continue laying flooring. Always check your working lines to be sure the floor is still aligned. Use tapping block to fit planks together, but be careful not to let installed floor move on the wet adhesive while you are working. Always leave at least a 3/8’’ expansion space between flooring and vertical objects (such as pipes and cabinets). Use wood or plastic spacers during installation to maintain this expansion space. Remember to stagger end joints from row to row at least 8” apart.
When first section is finished, continue to spread adhesive and lay flooring section by section until installation is complete. Use a damp cloth to IMMEDIATELY REMOVE ANY ADHESIVE that gets on the flooring surface. If adhesive cannot be completely removed with a damp cloth, use the manufacturer’s recommended adhesive remover. Never let flooring adhesive dry completely on the finished surface.
Walk each section of flooring in order to make sure it is well bonded to the subfloor with the adhesive working time. Flooring planks on the perimeter of the room may require weight on them until adhesive cures enough to hold them down.

NAIL DOWN INSTALLATION
Make sure subfloor is tested for moisture content first and is properly prepared. Use an air stapler/nailer compatible with the profile of the flooring material (or) a stapler/nailer of your choice. Test on a sample to make sure that stapling/nailing will not cause dimpling (localized raised edges) in the finished floor. (Note: be sure to look at the face of the installed flooring at a low angle from a distance to see if dimpling is occurring as it is hard to see when directly above the floor.) If dimpling does occur, STOP and adjust the stapler/nailer shoe and and angle/place of staple entry in order to avoid it. Green World Industries is not responsible for dimpling.
For the first and second rows: lay first plank inside chalk line with grooved edge toward wall. Install entire first row in the same manner. Always leave at least a 3/8’’ expansion space between flooring and vertical objects (such as pipes and cabinets). Use wood or plastic spacers during installation to maintain this expansion space. In order to affix the first rows, as it is difficult to get the nail gun in place next to the wall, you may wish to set these rows in mastic and glue them down rather than face nailing them and leaving unsightly nail holes which much be filled with putty to match the wood floor.
After gluing down these starting rows with manufacturer’s recommended adhesive, set weight on top of these rows and allow them to set before commencing stapling/nailing the additional rows, as nailing the adjacent rows may cause the starting rows to subsequently move. Make sure they starting rows are straight and drawn tight.
Subsequent rows: Lay by using floor nailer/stapler to blind-nail top inside edge of tongue at a 45 degree angle. Nail each board every 8” and within 2” of each end. Remember to stagger end joints from row to row at least 8” apart and using a tapping block to fit boards together. It may be necessary to facenail in doorways or tight areas where the nailer/stapler can’t fit, (or glue down in these areas and weight them while the mastic sets). The last two rows will need to be face-nailed, (or glued down), in the same manner as the first two rows.
Always make sure to visually check the installed floor as you go to ensure that the stapling/nailing is not causing dimpling on the face.
FLOATING INSTALLATION
Make sure subfloor is tested for moisture content first and is properly prepared.
Floating installation method should only be used on engineered floors measuring at least 5” in plank width. A 1/8” thick pad and polyfilm is required.
Laying polyfilm: Lay at least a 6-mil polyfilm with seams overlapped 8”. Fasten seams every 18-24” with duct tape. Run the outside edges of film up perimeter of each wall 4”. Trim after flooring installation is complete.
Laying pad: Lay underlayment by butting edges, not overlapping. Tape full length of the seam with duct tape. Leave ½” space between pad and all walls and permanent vertical fixtures.
Installing the floor: Start first row with groove toward wall. Glue end joints of first row by applying a small but continuous bead tongue and groove adhesive or PVAC glue to bottom side of the groove. Always leave at least a 3/8’’ expansion space between flooring and vertical objects (such as pipes and cabinets). Use wood or plastic spacers during installation to maintain this expansion space. Lay subsequent rows of flooring by applying glue to side and end joints and fitting planks together with a tapping block. Remember to stagger end joints from row to row at least 8” apart.
Clean up any adhesive that is on the face of the floor by using a damp rag—DO NOT allow adhesive to dry on the flooring face as it is difficult to remove without damaging the finish.
IN-FLOOR RADIANT HEAT
- The maximum allowable temperature is 80° Fahrenheit.
- System must be fully operating at normal temperature for a minimum of 21 days prior to floor installation.
- Turn the heat off for 24 hours before, during and 24 hours after installation when installing over radiant heated subfloors
- Use only recommended flooring adhesive over manufacturer’s recommended plywood substrate. NOTE: Only the pre-installation and structural warranties of Green World Industries Hardwood Flooring are valid over radiant heat, as we cannot control the specifications stated above.
- Failure to turn the heat off may result in shortened working time of the adhesive.
- Floor temperature must not exceed 85°F (30° C).
- Failure to strictly follow adhesive manufacturer’s guidelines may result in failure and void warranty
This type of installation requires a specific construction of the plywood subfloor and the installer for such must be familiar with the NWFA recommendations.
GENERAL RADIANT HEAT INSTALLATION GUIDELINES
- Radiant systems work effectively and with less trauma to the wood floor if the heating process is gradual, based on small incremental increases in relation to the outside temperature.
- Subfloors should have proper moisture tests according to testing procedures outlined by the NWFA.
- Avoid penetration of the heating element or tubing.
- Concrete subfloors should be fully cured.
- With water-heated radiant-heat systems, a pressure test must be performed by a qualified plumber or the system installer prior to beginning the installation of the wood flooring.
- Radiant heat is dry heat and a humidification system may be necessary to maintain wood flooring in its comfort zone.
TIPS FOR AFTER INSTALLATION
- Flooring should be one of the last items installed in a construction project. In order to protect the floors while other trades are finishing their work prior to final cleanup and turnover to the owner, use rosin paper and only use 3m® Blue Tape to hold the rosin paper to the floor (other blue tapes may damage the finish). Clean the floor thoroughly before laying the rosin paper to ensure that no debris is trapped underneath. DO NOT USE plastic film or other non-breathing coverings as this can cause the floor to become damaged from humidity buildups.
- Remove expansion spaces and reinstall base and/or quarter round moldings to cover the expansion space.
- Install any transition pieces you will need at this time.
- If using glue-down method, do not allow foot traffic or heavy furniture on floor for at least 24 hours.

CARE AND MAINTENANCE
IMMEDIATELY AFTER INSTALLING POLYURETHANE FINISHED FLOORS
- Vacuum the floor to remove dirt and debris.
- Clean the floor with a recommended cleaner.
ROUTINE MAINTENANCE
- Dust mop or vacuum your wood floor regularly using a vacuum with no beater bar. DO NOT USE A VACUUM WITH A BEATER BAR HEAD. Damage caused by use of a beater bar head is excluded from warranty coverage.
- Periodically, clean your floor with a recommended cleaner. You never need to wax your floor.
- DO NOT USE MICROFIBER ON A UV CURED OIL FLOOR. Damage caused by a microfiber is excluded from warranty coverage. See our maintenance and care booklet specifically designed for UV Cured Oil Floors.
- DO NOT WET-MOP, DAMP-MOP OR CLEAN YOUR HARDWOOD FLOOR WITH WATER. DO NOT USE A STEAM CLEANER OR HARDWOOD FLOOR CLEANING MACHINE ON OUR HARDWOOD FLOORS. DO NOT ALLOW EXCESS CLEANER TO REMAIN ON FLOOR SURFACE AS IT MAY DAMAGE THE WOOD. Damage caused by any of these is excluded from warranty coverage.
PREVENTATIVE MAINTENANCE
- Never clean your floor with water or a wet mop. Excess moisture may damage your floor.
- Never use any kind of wood polish or solvent-based dressing that can dull or damage the finish.
- Place protective mats by doorways to keep dirt and moisture from being tracked across from your floor. Area rugs are recommended in front of sinks and tubs with a non-abrasive and nondiscoloring backing.
- Install floor protectors on furniture legs.
- Clean up spills quickly before they get sticky and dry.
- Spike or stiletto heel shoes, especially those with worn heels, can dent and scratch hardwood floors.
- Keep pet’s nails trimmed.
- Use soft rubber castors for rolling furniture.
- Natural floors contain organic pigments and are subject to fading when exposed to direct sunlight. Where possible, use drapery or other systems to protect you floor from excessive light.
LIMITED RESIDENTIAL WARRANTIES
These warranties, which begin from the date of purchase, apply to products used in dry residential applications. These warranties apply only as long as the original purchaser owns and resides in the home where the product was originally installed.
These limited warranties apply to you only if you: (1) are the original purchaser of any Green World Industries first quality engineered hardwood floor; (2) have paid in full for your hardwood floor, and (3) have purchased the hardwood floor for your own personal residential use and not for resale. These warranties ARE NOT transferrable or assignable and they DO NOT APPLY to nonresidential properties, rental properties, or properties used in whole or in part for commercial uses.
If professionally installed, Green World Industries will pay the reasonable labor costs to perform the replacement or repair during the first five (5) years from the date of the original purchase. In the event that the style installed in the home is no longer available, Green World Industries will authorize your dealer to replace the affected floor with another style of equal value. This is the purchaser’s sole and exclusive remedy for claims under the limited warranty.
During the warranty period, should you have any problems with your Green World Industries floor, please contact the authorized dealer who sold the product withing 30 days from the date the problem occurred. Please note that these dealers are not authorized to make any decisions regarding warranty coverage or any remedies under the warranty. Green World Industries must be given the opportunity to inspect the floor while it is still installed to determine any warranty coverage or remedy. Failure to timely report the problem or defect or failure to allow Green World Industries the opportunity to inspect the floors while installed will result in the waiver of the warranty and/or will void the warranty.
LIMITED STRUCTURAL WARRANTY
Green World Industries warrants that all of our first quality engineered hardwood flooring, at the time of their original manufactured condition, will be free from manufacturing defects in material and workmanship including milling, assembly, dimension, and grading. Green World additionally warrants that these engineered hardwood floors will not delaminate when properly installed and maintained according to Green World Industries’ installation and maintenance and care instructions, guidelines and procedures. This warranty is solely to the original purchaser of the goods who has paid in full for the hardwood flooring and is not transferable or assignable. This limited structural warranty does NOT apply to non-residential properties, rental properties, or properties used in whole or in part for commercial purposed.
LIMITED WARRANTY FOR RESIDENTIAL FINISH WEAR
Green World Industries warrants that all of our first quality engineered hardwood flooring, when used under normal residential traffic conditions and usage and with strict adherence to our installation, maintenance and care instructions, that it’s surface wear layer will not wear through or peel off of the hardwood flooring during the length of the warranty of the product you purchased. Please NOTE that this limited warranty extends only for defects that cover at least 10% of the surface area of the installed flooring. Please also NOTE that gloss reduction, scratches and dents in the finish are NOT considered surface wear and are not covered under this or any warranty
WARRANTY EXCLUSIONS
The following list contains items or situations that are EXCLUDED BY AND ARE NOT COVERED UNDER WARRANTY:
- Wood is a natural product and contains natural variations in color, tone, graining and knotting. Green World Industries does not warrant against natural variations in color or any other variations in color such as mineral streaks, small knots, and grain variations from plank to plank.
- Green World Industries does not warrant against natural variations in colors, natural attributes, or gloss levels between samples and installed flooring. Any sample shown or used by your seller is for demonstrative purposes only and does not create a warranty of any kind or character that the goods you purchased will conform to the sample. Any warranties based upon any such sample is specifically disclaimed and excluded.
- Damage caused by the failure to install, care, or maintain the floor according to Green World Industries’ instructions and/or the guidelines and instructions recommended by the National Wood Flooring Association (“NWFA”).
- Damage caused by the improper storage, handling or installation methods; improper preparation of or deficiencies in the subfloor, floor joist assembly, or voids in the subfloor; and/or damage caused by other manufacturers’ products.
- Damage caused by construction traffic or other subcontractors; abuse to the surface of the floor; use of non-recommended nailers, staplers, or adhesives; scratches from sands, grits and/or debris from construction; accidents; abuse; misuse; lack of or insufficient furniture leg protectors; improper protection while moving furniture or heavy objects; damage caused by pet claws or chewing; and/or damage caused by nails and other abrasives.
- Flooring installed in a property used in whole or in part as a rental property for any period of time is not covered by any warranty and is excluded from any warranty coverage of any kind or character.
- Flooring installed in a commercial property, non-residential property, or property used in whole or in part for commercial purposes is not covered by any warranty and is excluded from any warranty coverage of any kind or character.
- Flooring installed in a property used for any period of time in whole or in part as an “air bnb” or the like is excluded from warranty.
- Damage caused by man-made or natural disasters, including but not limited to leaking or broken plumbing, landscape watering/irrigation, fire, flood, earthquake, insect infestation, or standing water during or after construction.
- Damage caused by moisture infiltration from side walls, through the subfloor or from any source.
- Normal wearing of the finish in high traffic areas, pivot points and seating areas.
- Cracks or checks in the surface and damage caused by improper environment, fluctuations in humidity, or too low or high humidity.
- Damages as a result of acts of God.
- Alterations to the finish or non-factory applied finishes.
- Gloss reduction, scratches and dents in the finish are not considered surface wear and are not covered under our warranty.
- Green World Industries’ products are not warranted against squeaking, popping or crackling. Some squeaking, popping or crackling is possible when using floating installation methods or staple-down or nail-down installation methods.
- Our floors are not warranted against staple or nail pullout from the subfloor.
- Alterations or modifications of the original manufactured products, or not following NWFA installation guidelines.
- Damages arising from subflooring, plumbing breakage or leakage and similar catastrophes, and failures arising as a result of hydrostatic pressure.
- Water damages from pipes leaking, broken plumbing, standing water and spillage of fluids.
- Change of shading as a result of exposure to or being hidden from direct or indirect sunlight.
- Damages from not using recommended cleansers for UV polyurethane finished and oil finished wood flooring, resulting in a damaged or dull finish.
- Delamination as a result of excessive moisture in the surrounding environment and/or substrates.
- Insect infestation. This warranty does not cover any damages caused by insect infestation.
- Failure to allow Green World Industries to inspect the floor while it is installed will void any claim.
- This warranty does not include the cost of labor if the flooring is installed by other than professional installers.
- Downgraded Product. Warranties do not apply to any products designated or sold as B-grade or Cabin grade, or which is sold “as is”.
- Wood can be photosensitive and will change color as they age or are exposed to UV light. As this is a natural occurring phenomenon, it is NOT considered a material defect and is excluded from coverage under the provisions of Green World Industries Limited Warranty. You can minimize fading and discoloration by: 1) Avoiding rubber backed mats that may discolor your floor; 2) change the location of your rugs periodically. Rearrange more frequently if they are placed in front of doors and windows; 3) Use light filtering window treatments (i.e. blinds, drapes, window film) that will help prevent sunlight exposure; and 4) rearrange furniture seasonally to allow the flooring to darken and age uniformly.
Please note: If completing a flooring extension or board replacement after the original installation has been down for a period-of-time, the new flooring will have a different appearance. As the material is exposed to natural light, it should eventually blend in with the surrounding areas. However, due to the age of your flooring, surface wear (and/or) exposure to UV light, Green World Industries cannot guarantee replacement flooring will be a perfect match to your existing products. Remember that color variation is to be expected with natural products.
WARRANTY DISCLAIMERS
ANY WARRANTIES ARISING OUT OF THIS SALE IN ADDITION TO THE ABOVE LIMITED WARRANTIES, INCLUDING BUT NOT LIMITED TO THE IMPLIED WARRANTIES OF MERCHANTABILITY AND FITNESS FOR A PARTICULAR PURPOSE, ARE LIMITED IN DURATION TO THE LIMITED WARRANTY FOR RESIDENTIAL FINISH WEAR DESCRIBED ABOVE. GREEN WORLD INDUSTRIES SHALL NOT BE LIABLE FOR LOSS OF USE OR ANY OTHER INCIDENTAL OR CONSEQUENTIAL COSTS, EXPENSES OR DAMAGES INCURRED BY THE PURCHASER OR BY ANY OTHER PERSON. THE REMEDIES AS DESCRIBED IN THESE WARRANTIES ARE THE SOLE AND EXCLUSIVE REMEDIES AVAILABLE TO YOU FOR ANY BREACH BY GREEN WORLD INDUSTRIES OF THE EXPRESS AND IMPLIED WARRANTIES ARISING FROM THIS SALE. THESE WARRANTIES EXCLUDE CONSEQUENTIAL AND INCIDENTAL DAMAGES, INCLUDING BUT NOT LIMITED TO REMOVAL OR DAMAGE TO MOLDINGS, CABINETS, BUILT-IN APPLIANCES, CARPETING, DRYWALL, WALLPAPER, PAINT, AND ALL RELOCATION COSTS ASSOCIATED WITH ANY REPAIR OR REPLACEMENT OF THE FLOORING. YOU UNDERSTAND AND AGREE THAT ALL INCIDENTAL AND CONSQUENTIAL DAMAGES ARE SOLELY YOUR RESPONSIBILITY AND ARE EXCLUDED AS A POTENTIAL REMEDY FOR ANY BREACH BY GREEN WORLD INDUSTRIES OF THE EXPRESS AND IMPLIED WARRANTIES ARISING FROM THIS SALE. SOME STATES DO NOT ALLOW LIMITATIONS ON THESE AVAILABLE REMEDIES, OR THE LENGTH OF AN IMPLIED WARRANTY OR THE EXCLUSION OR LIMITATIONS ON THE AVAILABLE REMEDIES, OR THE EXCLUSION OF INCIDENTAL OR CONSEQUENTIAL DAMAGES, SO THE ABOVE LIMITATIONS MAY NOT APPLY TO YOU. THESE WARRANTIES GIVE YOU SPECIFIC LEGAL RIGHTS, AND YOU MAY HAVE OTHER RIGHTS THAT VARY FROM STATE TO STATE. UNLESS A STATEMENT MADE IN THIS DOCUMENT IS SPECIFICALLY IDENTIFED AS A WARRANTY, ANY OTHER STATEMENTS MADE HEREIN, OR BY YOUR SELLER, ARE NOT WARRANTIES AND ARE NOT PART OF THE BASIS OF THE BARGAIN FOR THE SALE OF THE HARDWOOD FLOORS. ANY AND ALL WARRANTIES, EXCEPT THOSE LIMITED WARRANTIES PROVIDED HEREIN, OR BY YOUR SELLER, ARE NOT WARRANTIES AND ARE NOT A PART OF THE BASIS OF THE BARGAIN FOR THE SALE OF THE HARDWOOD FLOORS. ANY AND ALL WARRANTIES, EXCEPT THOSE LIMITED WARRANTIES PROVIDED HEREIN, ARE SPECIFICALLY DISCLAIMED AND EXCLUDED. THIS AGREEMENT SHALL BE GOVERNED BY AND CONSTRUED IN ACCORDANCE WITH THE LAWS OF THE STATE OF TEXAS AND ANY APPLICABLE FEDERAL LAWS OF THE UNITED STATES OF AMERICA. ANY ACTION BROUGHT SEEKING THE RESOLUTION OF ANY CONTROVERSY ARISING OUT OF OR RELATING TO ANY WARRANTIES REFERENCED HEREIN SHALL BE BROUGHT IN THE COURTS OF THE STATE OF TEXAS OR IN THE UNITED STATES DISTRICT COURT FOR THE WESTERN DISTRICT OF TEXAS.
TO FILE A CLAIM
Any claim for warranty must be made in writing within 30 days after a problem has been detected or it is waived. Please direct all claims to the retailer where the flooring was purchased. Green World Industries reserves the right to have a representative of its own selection to inspect the site and product while the flooring is still installed and to be involved in the final evaluation.